
How would you like to be able to create custom remarketing audiences. Let’s assume you are interested in people who clicked the video play button, read 75% of the content on a selected page, or downloaded a PDF.
Table of contentsExpand
With Google Tag Manager, you can send such events to Google Analytics and, based on them, create user segments and then build audiences from them and use them in Google Ads advertising campaigns. You can carry out similar activities using the Facebook Pixel.
This is only a small part of what Google Tag Manager can do for you. I invite you to read on.
What Is Google Tag Manager?
Google Tag Manager was made available 14 years ago! It is a brilliant tool that allows marketers to modify website code without the help of developers.
Working at a marketing agency, you have likely encountered more than once the problem of implementing a tracking code or conversion code on a website, which took anywhere from several days to a dozen or so days. You managed to configure the campaign and then waited two weeks to launch it, or you did not collect data because adding a few lines of conversion code to the code was a problem.
With Tag Manager, you can manage codes on the website yourself, without the help of developers.
Importantly, this tool is quite easy to use and free of charge. It allows you to manage scripts or tracking codes, measure user engagement, and track their behavior on the website. Above all, however, it enables you to make the right marketing decisions for your business.
How to Implement Google Tag Manager?
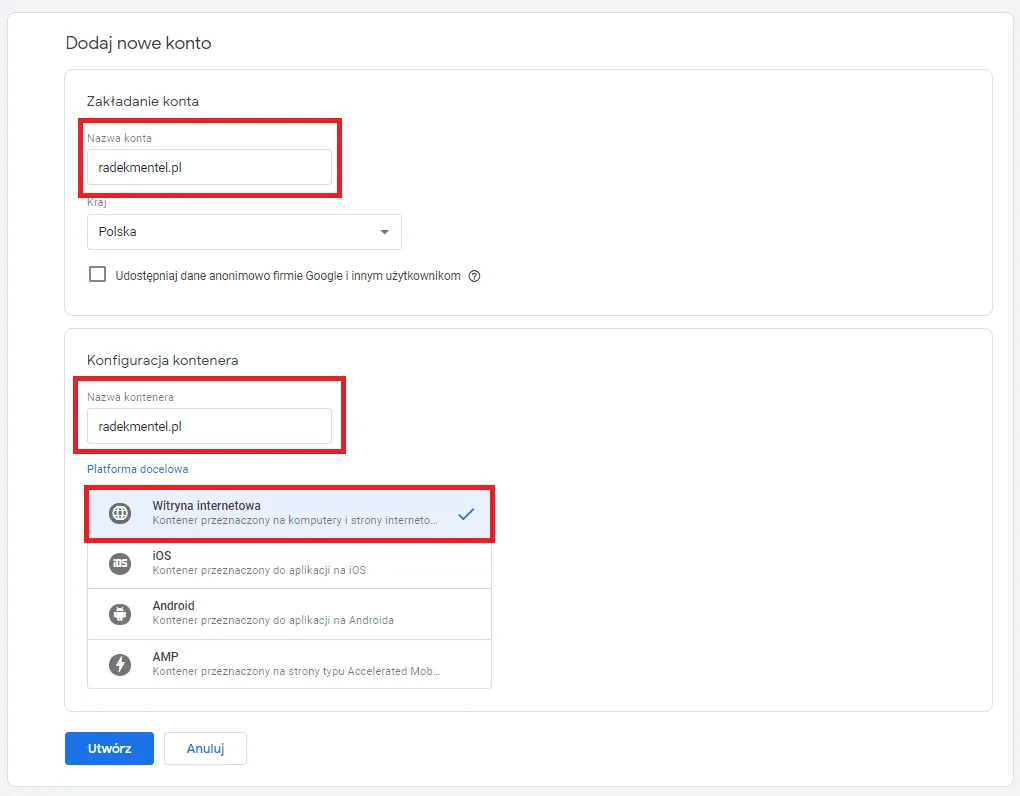
If we use an email address created on Gmail, we go to https://tagmanager.google.com, log in to the panel, and create a new account. It is incredibly simple: we fill in two fields and make two selections:
- Account name — if you have an agency or several projects from one client, think carefully about the name so that it makes it easy for you to navigate the manager panel
- Country selection
- Container name — I usually enter the website name here
- Target platform selection; in most cases, this will be Website
- We accept the terms and voilà!
 A code will appear before our eyes, which we need to add to our website or online store. This can be done in several ways, depending on whether our website is a popular ecommerce solution or a custom-built solution. There are plenty of plugins for ecommerce solutions and WordPress that will allow us to implement the code without the help of a developer.
Once the code is on the website, possibilities limited only by our imagination open up before us. All the more so because the tool is constantly being developed, but what it offers now already provides powerful capabilities.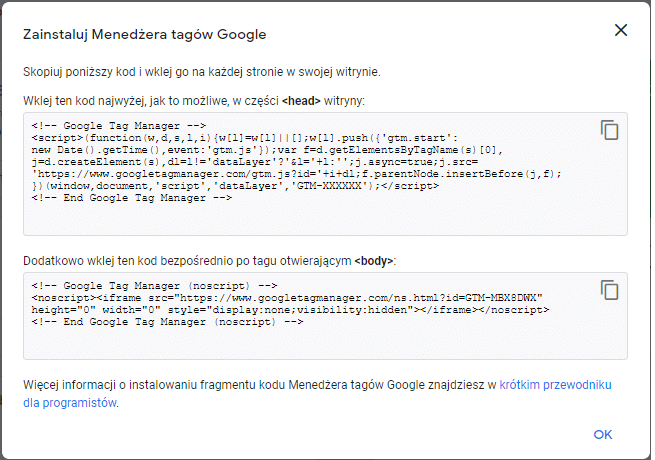
8 Reasons Why It Is Worth Implementing GTM
1. Ease of Implementation / Website Speed
You know how little it takes to launch Google Tag Manager on your website; it comes down to placing the code in two places on every page
Aside from bypassing the IT department, Google Tag Manager is a very easy-to-use tool. Adding the most popular scripts or custom codes is simply child’s play. Anyone who devotes a moment to this tool will be able to configure tags correctly. Remember, you do not need to know even the basics of programming!
Implementing GTM may also help speed up your website! This is because GTM loads asynchronously. This means that website elements that can load earlier do not wait for the slower ones and do not block the website content from loading. Remember that page load speed affects the revenue generated.
2. Bypassing the IT Department When Managing Codes!
I wrote about this at the beginning of the post, but this solution gives me so much satisfaction that I will keep repeating endlessly about bypassing the IT department and the time it takes to complete tasks :). Imagine that you send a script to the IT department for implementation and, in the best-case scenario, you wait one day. What happens if they do it incorrectly? For example, they do not place it on all pages. You write another message, and the correction may already take several days. I know this from experience, which is why I have come to love GTM so much.
3. Flexibility
You are not a developer, and yet you can make changes to the website — WOW! Thanks to GTM, you do not have to be one! Google Tag Manager requires a minimal amount of coding for more complex tags, but most of them can be created without writing a single line of code. That is why it is an excellent tool for marketers.
Developers and IT staff will love GTM’s virtually unlimited customization options. Who will benefit most from GTM will depend on your website and the complexity of the tasks you want to achieve.
4. Built-In Tags
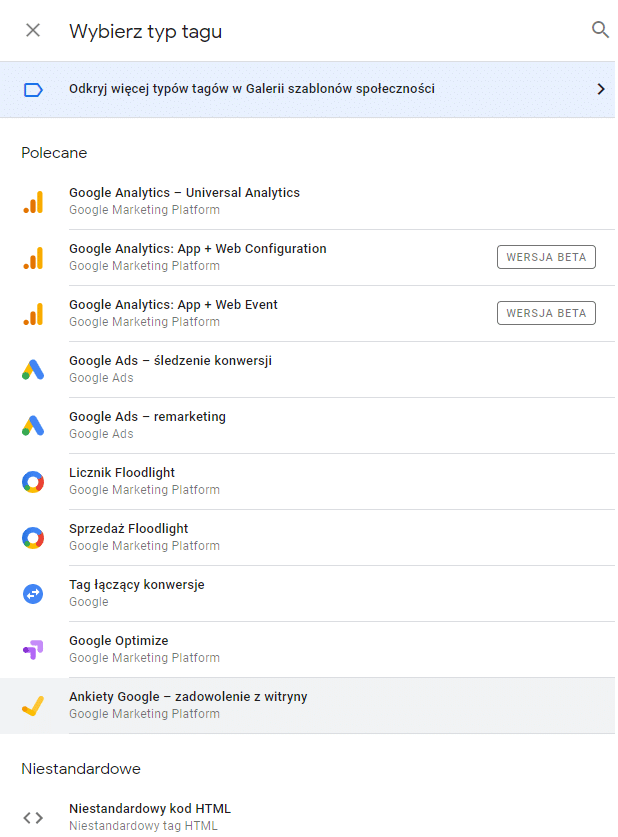
GTM has plenty of built-in tags for Google Analytics, Google Ads conversions, remarketing, as well as many third-party tags. This is extremely important for marketers who are just starting their journey with GTM and who have no programming experience. You can easily customize any built-in tag with just a few pieces of information and without the complications associated with implementing code.
5. Debugging Options
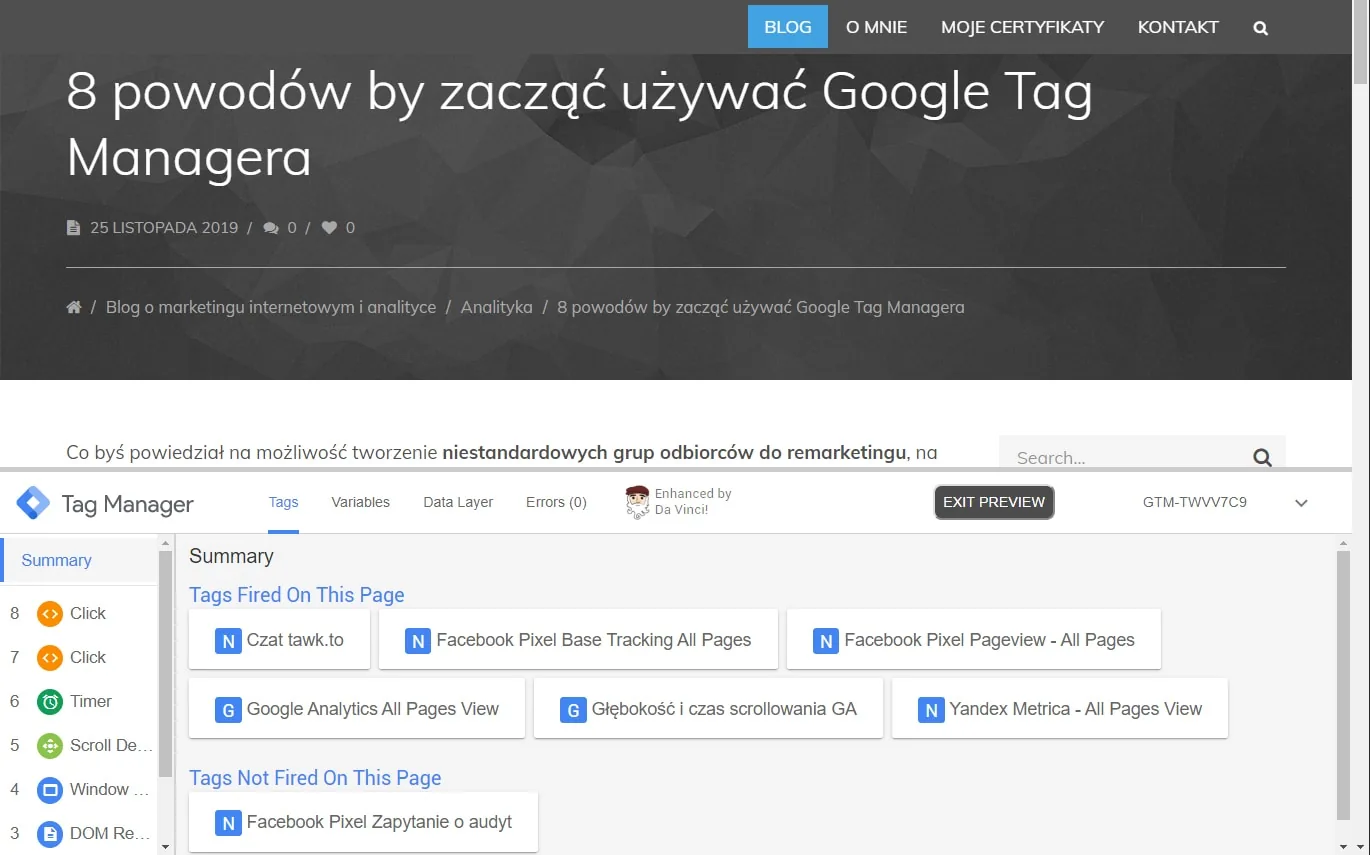
Before publishing tags, you can make sure they work correctly — by checking it on the live website! This is an extremely useful feature that allows you to verify the entire tag configuration before “releasing” it to production. You will see whether they fire at the right moment, for example a tag related to reading 75% of a blog post and spending 10 seconds on the page, as shown in the image below. What is more, you can prepare changes and publish them at a later date.
6. Security
You are probably wondering whether implementing GTM is safe for your website; if implemented correctly, it will not cause any errors. GTM is safe and will not pose a threat. However, you must remember that it allows any code to be placed on the website, and the code you place through it must be verified and come from a trusted source.
7. Version Control
When creating GTM, absolutely everything was thought of. You publish a new version of a tag and it turns out that it does not work properly? You can very quickly revert to its previous version. When a change is published in the container, a new version is created, while the old one is archived and you have access to it. You can restore it at any time. You can also check when the changes were published and by whom. 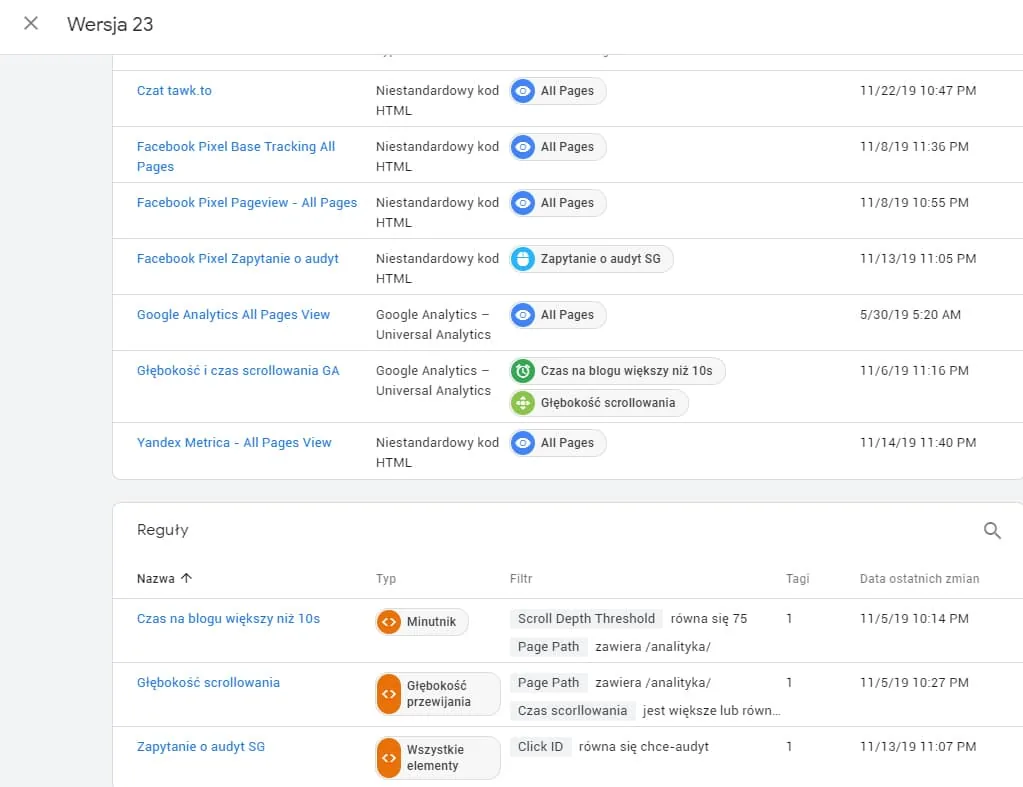
8. User Management
Google Tag Manager allows you to set permissions for individual users, including viewing, editing, and publishing. You can control who has the ability to update and add tags. Permissions can be managed at two levels: the account level and the container level.
At the account level, we have 2 permission levels:
- Administrator
- User
At the container level, we have the following types of permissions:
Access is assigned for individual containers. A user may have the following permissions:
- No access: the user does not see the container in the list in the account.
- Read: the user sees the container in the list and can view the tags, triggers, and variables it contains, but does not have permission to make changes to them.
- Edit: the user has permission to create workspaces and make changes, but cannot create versions or publish anything.
- Approve: the user has permission to create versions and workspaces and make changes, but cannot publish anything.
- Publish: the user has permission to create versions and workspaces, make changes, and publish.
Summary
If you have made it this far, you probably do not have Google Tag Manager implemented. I hope I have convinced you to use this solution, as it has incredible capabilities; I wrote above about the reasons for implementing it.

About the author
Radosław Mentel
Certified Google Partner (Ads & Analytics) with over 17 years of experience. For years, I've taught marketing at SGH and judged the best campaigns in Poland as a semKRK Awards judge.
More about me